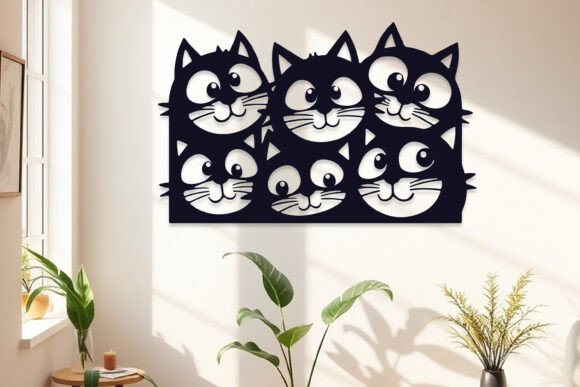
Laser Cut Cat Wall Art SVG Guide
There is a distinct satisfaction in watching a digital design transform into a tangible object. For crafters, interior designers, and small business owners, the intersection of precision technology and artistic expression offers endless possibilities. Among the most charming and versatile subjects for this medium is feline imagery. A Laser Cut Cats Wall Art Decor SVG is not merely a file; it is a blueprint for creating layered, three-dimensional narratives that bring warmth and personality to any space. Whether you are decorating a nursery, adding character to a modern living room, or building a product line for an online store, understanding how to leverage these digital assets can elevate your creative output significantly.
The Appeal of Layered Feline Designs
Cats have long been muses for artists, but in the realm of laser cutting, they offer unique structural advantages. Their silhouettes are recognizable yet fluid, allowing for intricate detailing in whiskers, tails, and fur texture without compromising the structural integrity of the material. When designed as a multi-layered piece, a cat illustration gains depth. Shadows cast by upper layers onto lower ones create a natural contrast that changes with the lighting in the room, making the artwork dynamic rather than static.
Using a high-quality Laser Cut Cats Wall Art Decor SVG allows creators to bypass the tedious process of manual vectorization. Instead, you start with a professionally engineered file where bridge points, cut lines, and layer separations are already optimized. This ensures that delicate features, such as the tip of a ear or the curve of a tail, survive the cutting process without falling out or burning excessively. For professionals, this reliability is crucial for maintaining consistent quality across multiple orders.
Understanding Your Digital Assets
When you purchase a premium design package, versatility is key. A comprehensive zip file typically includes a wide array of formats to ensure compatibility with various software ecosystems and hardware capabilities. Knowing what you have access to helps you streamline your workflow.
- AI and EPS: These vector formats are ideal for users working in Adobe Illustrator or CorelDRAW. They allow for infinite scaling without loss of quality and provide full editability if you wish to customize the design further.
- SVG: The standard for web-based cutting software like Cricut Design Space or Silhouette Studio. It preserves vector data while remaining lightweight and easy to upload.
- DXF and DWG: Essential for industrial laser cutters and CAD software. These formats are often required for larger format machines used in professional fabrication shops.
- JPG and PNG: High-resolution raster images useful for previewing the design, creating marketing materials, or using as reference guides during the assembly process.
Having access to all these formats means you are not locked into a single platform. You can design on a tablet, prepare files on a desktop, and cut on anything from a hobbyist diode laser to a commercial CO2 unit.
Creative Applications and Project Ideas
The utility of a Laser Cut Cats Wall Art Decor SVG extends far beyond a simple framed picture. By thinking laterally about materials and context, you can adapt the same core design for various markets and purposes.
Home Decor and Interior Styling
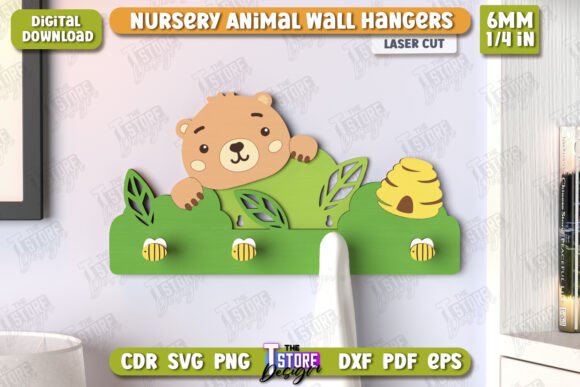
For home decorators, layered paper art is a trending aesthetic. Using cardstock in varying shades of gray, cream, or pastel tones, you can create a shadow box effect. This approach is particularly effective for nurseries or pet-friendly homes. To enhance the visual impact, consider using textured papers or handmade washi paper for the background layers to add organic warmth. Mounting the finished piece in a deep-frame shadow box protects the delicate layers while emphasizing the 3D effect.
Custom Gifts and Memorials
Pet owners often seek meaningful ways to commemorate their companions. A laser-cut portrait based on a specific breed or even a custom silhouette derived from a photo can serve as a heartfelt memorial. By offering personalization options—such as adding a nameplate layer or adjusting the pose—you can transform a standard SVG into a bespoke product. This adds significant perceived value and allows for higher pricing tiers in a small business model.
Commercial Signage and Branding
Cafés, bookstores, and veterinary clinics often incorporate animal motifs into their branding. A large-scale version of a cat design, cut from acrylic or wood, can serve as an eye-catching wall feature or window decal. Acrylic offers a sleek, modern look, especially when backlit with LED strips. The clean lines of vector graphics ensure that even at large sizes, the edges remain crisp and professional.
Step-by-Step Assembly Guide
Executing a multi-layered laser cut project requires patience and precision. While the digital file handles the geometry, the physical assembly determines the final aesthetic quality. Follow these practical steps to ensure a professional finish.
- Preparation and Extraction: Begin by downloading the file to your computer. Extract all contents from the zip archive into a dedicated folder. Organize your files by format so you can quickly locate the correct version for your software. Inspect the SVG or AI file in your preferred design program to verify that all layers are present and correctly colored or grouped.
- Machine Setup and Cutting: Upload the file to your cutting machine’s software. Assign specific cut settings for each material type. If you are using different colors for each layer, ensure your software recognizes these distinctions. Perform test cuts on scrap material to dial in power and speed settings, ensuring clean edges without excessive charring. Proceed to cut each layer, keeping them organized as they come off the bed.
- Weeding and Cleaning: Carefully remove the excess material (weeding) from each layer. Use tweezers for small, intricate details like eyes or whisker gaps. Clean any soot or residue from the edges using a soft cloth or a mild cleaner appropriate for your material. This step is critical for ensuring that adhesive bonds properly and the final look is pristine.
- Layering and Assembly: Stack the layers in the correct order as per the serial numbering provided in the design guide. Use a lightbox or a bright window to align the layers accurately. Apply adhesive sparingly using a fine-tip glue bottle or double-sided tape dots to prevent warping. Press gently but firmly, allowing the adhesive to set before moving to the next layer.
- Final Presentation: Once the assembly is complete and dry, mount the artwork in your chosen frame. Ensure the glass or acrylic cover does not crush the layered elements; spacers may be necessary for deeper designs.
Material Selection for Best Results
The choice of material dramatically influences the final appearance of your Laser Cut Cats Wall Art Decor SVG. Paper and cardstock are the most accessible options, offering a vast range of colors and textures. They are ideal for indoor decor and gifts. Wood veneers provide a rustic, natural aesthetic, perfect for cabins or traditional interiors. However, wood requires careful handling to avoid burn marks and may need sanding or staining post-cut.
Acrylic and MDF are excellent for durability and modern aesthetics. Acrylic can be mirrored, translucent, or opaque, allowing for playful interactions with light. When working with plastics, ensure proper ventilation and use masks rated for particulate matter. Always prioritize safety and material compatibility with your specific laser cutter.
Maximizing Originality and Consistency
To keep your results original and audience-friendly, consider experimenting with color palettes that deviate from the expected. Instead of realistic fur colors, try monochromatic schemes, geometric color blocking, or seasonal themes. For marketers and entrepreneurs, consistency is vital. Create a standard operating procedure for your cutting and assembly process. Document your machine settings for different materials and maintain a quality control checklist. This ensures that every piece you produce meets a high standard, building trust with your customers.
Furthermore, engage with your audience by sharing behind-the-scenes content. Show the digital design process, the cutting action, and the assembly journey. This transparency not only showcases the effort involved but also inspires others to appreciate the craftsmanship. By combining technical precision with creative vision, you transform a simple digital file into a cherished piece of art.
We are happy to answer any questions you may have regarding file compatibility or assembly techniques. Thank you for visiting my store and for supporting independent digital design.